 Now, I've always considered myself more of a 'hardware' modeler, but
the new 1/32 scale resin astronaut figure kits by Extra-Vehicular
Activity Models are truly keen. And, after all, spacesuits
are 'hardware,' right? Anyway, Chris Chulamanis has produced these
nicely detailed 1/32 scale resin kits of astronauts, both factual and
fictional. The subjects include Apollo moonwalkers (and golfers!),
Space Shuttle spacewalkers, and future space explorers. Now, I
usually think of figures this size (about 2 1/4 inches tall) as
supplements to kits, but these are quite capable of standing on their
own... in fact, these kits are so nifty, that I built up a couple to
take to the 1996 Nats in Virginia Beach. Not that I had any hopes of
taking a prize (I didn't), but these are the first kits that I've
finished since 1989! So I might as well show them off...
Now, I've always considered myself more of a 'hardware' modeler, but
the new 1/32 scale resin astronaut figure kits by Extra-Vehicular
Activity Models are truly keen. And, after all, spacesuits
are 'hardware,' right? Anyway, Chris Chulamanis has produced these
nicely detailed 1/32 scale resin kits of astronauts, both factual and
fictional. The subjects include Apollo moonwalkers (and golfers!),
Space Shuttle spacewalkers, and future space explorers. Now, I
usually think of figures this size (about 2 1/4 inches tall) as
supplements to kits, but these are quite capable of standing on their
own... in fact, these kits are so nifty, that I built up a couple to
take to the 1996 Nats in Virginia Beach. Not that I had any hopes of
taking a prize (I didn't), but these are the first kits that I've
finished since 1989! So I might as well show them off...

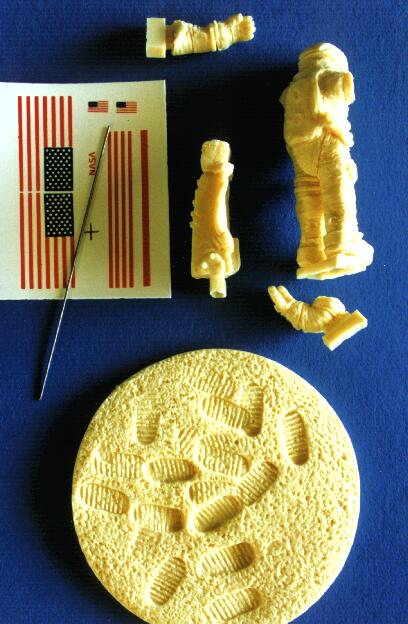
 kit #EVA005: Alan Shepard's Surprise Moon Shot.
This kit has 7 resin, 1 steel, and 1 copper parts, decals,
instructions, and a transcript of the golfing event taken from the Apollo Lunar
Surface Journal. With the exception of the base, all of the resin
parts are attached to a rectangular block of resin that serve as the
carriers. These need to be removed: I used a razor saw and cut the
parts off with ease. Then I cleaned up the stubs with files and
sandpaper. The resin is soft and easily cut: be careful not to remove
too much. I also had to remove a thin layer of 'flash' between the
legs of the figure. Again, this cleaned up easily with an X-acto
knife and sandpaper. I can't emphasize the quality of these castings
enough! There aren't any major and very few minor pinholes in the
resin. The instructions make it clear that the parts are designed to
fit together in only one way: if they don't fit, you haven't removed
enough of the carrier. Well, the instructions are correct as I found
out quickly enough. As with all kits, you should test-fit the parts,
especially when removing the carriers. In addition to the golf shot
kit, I also started work on the
kit #EVA005: Alan Shepard's Surprise Moon Shot.
This kit has 7 resin, 1 steel, and 1 copper parts, decals,
instructions, and a transcript of the golfing event taken from the Apollo Lunar
Surface Journal. With the exception of the base, all of the resin
parts are attached to a rectangular block of resin that serve as the
carriers. These need to be removed: I used a razor saw and cut the
parts off with ease. Then I cleaned up the stubs with files and
sandpaper. The resin is soft and easily cut: be careful not to remove
too much. I also had to remove a thin layer of 'flash' between the
legs of the figure. Again, this cleaned up easily with an X-acto
knife and sandpaper. I can't emphasize the quality of these castings
enough! There aren't any major and very few minor pinholes in the
resin. The instructions make it clear that the parts are designed to
fit together in only one way: if they don't fit, you haven't removed
enough of the carrier. Well, the instructions are correct as I found
out quickly enough. As with all kits, you should test-fit the parts,
especially when removing the carriers. In addition to the golf shot
kit, I also started work on the  Kevin Yeager,
Back to the Moon #1 kit. This kit is of a fictional moonwalker in
an early Apollo style suit. Unlike the Alan Shepard golfing figure,
this figure is photographing a boulder with a Hasselblad camera. Like
the Shepard figure, the Yeager figure consists of 7 resin pieces on
rectangular carriers, a circular base, and a bit of steel wire for the
PLSS antenna. Decals are provided so that you won't have to paint on
the red stripes that were used to distinguish the commanders after
Apollo XII. The instructions make it clear to trim the decals close
to the red, since they are all connected by the carrier film. The
blue flag field on the US flag decals is a bit off-register (the flag
decals in the Shepard kit also suffer from this), but that can be
fixed by cutting it out and applying it separately from the red and
white bars.
Kevin Yeager,
Back to the Moon #1 kit. This kit is of a fictional moonwalker in
an early Apollo style suit. Unlike the Alan Shepard golfing figure,
this figure is photographing a boulder with a Hasselblad camera. Like
the Shepard figure, the Yeager figure consists of 7 resin pieces on
rectangular carriers, a circular base, and a bit of steel wire for the
PLSS antenna. Decals are provided so that you won't have to paint on
the red stripes that were used to distinguish the commanders after
Apollo XII. The instructions make it clear to trim the decals close
to the red, since they are all connected by the carrier film. The
blue flag field on the US flag decals is a bit off-register (the flag
decals in the Shepard kit also suffer from this), but that can be
fixed by cutting it out and applying it separately from the red and
white bars.
 Just check out the detail in the camera for the Kevin Yeager figure.
This part is as small as my little fingernail!
Just check out the detail in the camera for the Kevin Yeager figure.
This part is as small as my little fingernail!
The instructions recommend gluing the parts together with superglue,
so that's what I used. I glued the left arm on the Shepard figure,
then had a devil of a time getting the right hand attached
 correctly... until I discovered that the outside edges of the hand
were supposed to overlap the arm. So I hollowed out the hand a bit
and then the parts fit nicely. After test-fitting the Yeager arms
onto the body, I decided to wait until the parts were painted before
attaching the arms for that kit. Otherwise, it will be very difficult
to paint the details on the front of the spacesuit. The instructions
recommend using white glue to mask off areas that will be glued later.
correctly... until I discovered that the outside edges of the hand
were supposed to overlap the arm. So I hollowed out the hand a bit
and then the parts fit nicely. After test-fitting the Yeager arms
onto the body, I decided to wait until the parts were painted before
attaching the arms for that kit. Otherwise, it will be very difficult
to paint the details on the front of the spacesuit. The instructions
recommend using white glue to mask off areas that will be glued later.
 I did this and also used white glue to attach all of the parts to
popsicle sticks to provide handles while painting, another useful tip
from the instructions. The only thing the instructions don't mention
is to scrub the parts before painting. Chris says he doesn't use any
mold releasing agent, but I think it's always a good idea to scrub
parts before painting: if for no other reason than to wash off greasy
fingerprints. I've given the parts an initial coat of Krylon white
sandable primer, followed by two coats of Polly-S flat white applied
with a brush. I then applied a very thin gray wash overall (since the
moonsuits got filthy), followed by a black wash along the
folds, creases, and suit hoses. After this I added bits of color
detail to the hose fittings, suit fasteners, and other hardware bits.
The instructions say to paint the visor black, but I painted them with
gloss black and rubbed in SNJ gold metal powder. The results are
rather promising, but would probably look better if the visor area had
been polished smooth. I used gray and black pastels to dirty up the
lower legs and feet of the figures, since (as I've said before) these
guys got dirty. When everything was done, I epoxied the bases to
the walnut display bases, put the dome in place, and stood back and
admired my work. Not bad for someone who hasn't finished anything in
this decade...
I did this and also used white glue to attach all of the parts to
popsicle sticks to provide handles while painting, another useful tip
from the instructions. The only thing the instructions don't mention
is to scrub the parts before painting. Chris says he doesn't use any
mold releasing agent, but I think it's always a good idea to scrub
parts before painting: if for no other reason than to wash off greasy
fingerprints. I've given the parts an initial coat of Krylon white
sandable primer, followed by two coats of Polly-S flat white applied
with a brush. I then applied a very thin gray wash overall (since the
moonsuits got filthy), followed by a black wash along the
folds, creases, and suit hoses. After this I added bits of color
detail to the hose fittings, suit fasteners, and other hardware bits.
The instructions say to paint the visor black, but I painted them with
gloss black and rubbed in SNJ gold metal powder. The results are
rather promising, but would probably look better if the visor area had
been polished smooth. I used gray and black pastels to dirty up the
lower legs and feet of the figures, since (as I've said before) these
guys got dirty. When everything was done, I epoxied the bases to
the walnut display bases, put the dome in place, and stood back and
admired my work. Not bad for someone who hasn't finished anything in
this decade...
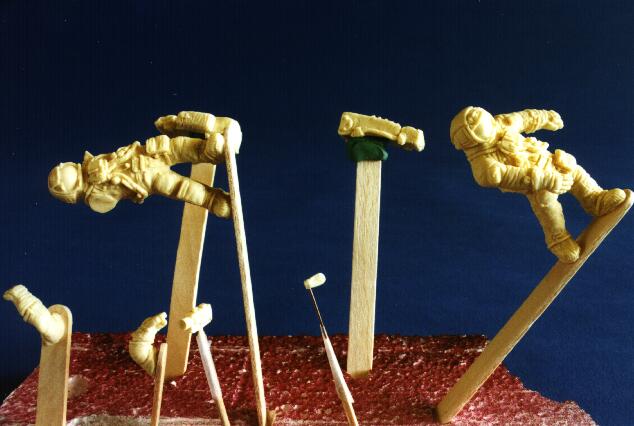
The finished Alan Shepard golf shot |
The finished Kevin Yeager |
 Alan Shepard makes another appearance with the US flag in kit #EVA002.
 This kit includes a large
decal to use as the flag, and a steel wire to serve as the flagpole.
And like the two kits described above, it has a circular resin base on
which to mount the finished figure. This kit has Shepard standing at
attention and saluting the flag.
This kit includes a large
decal to use as the flag, and a steel wire to serve as the flagpole.
And like the two kits described above, it has a circular resin base on
which to mount the finished figure. This kit has Shepard standing at
attention and saluting the flag.
Again, you can see the detail in the parts. As in the other kits, I
removed the carrier bits, test-fitting the parts together until I was
satisfied with the fit. Then I used white glue to glue the pieces to
popsicle sticks after giving the parts a thorough scrubbing to remove
my greasy fingerprints.
 I also used white glue as a masking agent to
mask off those areas that will be glued together, avoiding the chore
of scraping the paint off later. I have sprayed on a coat of primer
and will continue painting the parts as time goes on. I'll update
this section and include photos of the completed kit whenever it's
done.
I also used white glue as a masking agent to
mask off those areas that will be glued together, avoiding the chore
of scraping the paint off later. I have sprayed on a coat of primer
and will continue painting the parts as time goes on. I'll update
this section and include photos of the completed kit whenever it's
done.

|

|

|

|
 Fictional spacesuited figures make their appearances with the Space Miner and Scout Dog and the Astronaut Geologist kits. The detail on
these kits is again top-notch. I don't know what Chris used for
inspiration on the Space Miner, but the suit reminds me of the
spacesuits in the original Alien movie. And those suits were
based on Japanese samurai armor. Hey, whatever works.
Fictional spacesuited figures make their appearances with the Space Miner and Scout Dog and the Astronaut Geologist kits. The detail on
these kits is again top-notch. I don't know what Chris used for
inspiration on the Space Miner, but the suit reminds me of the
spacesuits in the original Alien movie. And those suits were
based on Japanese samurai armor. Hey, whatever works.
 As you can see from the photos, the detail is quite astounding. And
the beauty of these fictional kits is that you can paint them any way
you want! And, just as a side note, the dog is lifting his front leg
(as if pointing or shaking hands)... not his hind leg! Which brings
to mind, "How would a dog react to being in a spacesuit?"
As you can see from the photos, the detail is quite astounding. And
the beauty of these fictional kits is that you can paint them any way
you want! And, just as a side note, the dog is lifting his front leg
(as if pointing or shaking hands)... not his hind leg! Which brings
to mind, "How would a dog react to being in a spacesuit?" There are fewer parts to these kits: there's a drill (I think) that will be glued to a location just below the miner's left hand, and the tail for the dog. Each suit also has a small wire to represent an antenna. After cutting the carrier pieces off (including the base for the miner's feet) I glued the dog's tail onto the rear of his suit and glued all parts to popsicle sticks for painting. They've been primed and have had their primary color coats airbrushed on. Next will be the detailing and weathering.

|

|

|

|

 The astronaut geologist parts include the helmet, main body, a right
arm, a wire for the antenna, and a bit of vinyl tubing to represent a
control handle for the jet pack. This model depicts the geologist
jetting around an asteroid (so I imagine) while performing his survey
(for the miner to exploit later...). Removing the carrier from the
helmet and the main body requires that you sand the resulting surfaces
flat. At first I didn't remove enough carrier, so the poor guy looked
like a pencil-necked geek. So I just kept sanding until the helmet
looked right to me... your results may vary. I attached the helmet
and arm to the main body with gap-filling superglue and drilled out
one of the jets on the backpack. I used white glue to glue a bent
straight pin into the hole and then glued the pin to a stick for a
painting handle. It has been primed and is also awaiting final
detailing. Like the miner and dog, I've had some fun with the
colors... after all, you'd expect the suits to be brightly colored to
help any possible rescuers. Watch this space for the final
results.
The astronaut geologist parts include the helmet, main body, a right
arm, a wire for the antenna, and a bit of vinyl tubing to represent a
control handle for the jet pack. This model depicts the geologist
jetting around an asteroid (so I imagine) while performing his survey
(for the miner to exploit later...). Removing the carrier from the
helmet and the main body requires that you sand the resulting surfaces
flat. At first I didn't remove enough carrier, so the poor guy looked
like a pencil-necked geek. So I just kept sanding until the helmet
looked right to me... your results may vary. I attached the helmet
and arm to the main body with gap-filling superglue and drilled out
one of the jets on the backpack. I used white glue to glue a bent
straight pin into the hole and then glued the pin to a stick for a
painting handle. It has been primed and is also awaiting final
detailing. Like the miner and dog, I've had some fun with the
colors... after all, you'd expect the suits to be brightly colored to
help any possible rescuers. Watch this space for the final
results.

|

|

|
 EVA Models also sells nice little display
domes to keep your completed model free from dust. While dust
might add a bit of realism to the moonwalkers, it tends to be rather
indiscriminant about where it lands... These domes have an walnut base
(with felt pads on the bottom, so your shelf won't get scratched) and
a glass (not plastic) dome. The bases for the Alan Shepard and Kevin
Yeager kits fit very nicely on the base: almost like they were
designed that way! Since the other kits don't have a resin base,
you'll have to come up with one, or just glue the figure to the oak
base if you choose to do so.
EVA Models also sells nice little display
domes to keep your completed model free from dust. While dust
might add a bit of realism to the moonwalkers, it tends to be rather
indiscriminant about where it lands... These domes have an walnut base
(with felt pads on the bottom, so your shelf won't get scratched) and
a glass (not plastic) dome. The bases for the Alan Shepard and Kevin
Yeager kits fit very nicely on the base: almost like they were
designed that way! Since the other kits don't have a resin base,
you'll have to come up with one, or just glue the figure to the oak
base if you choose to do so.
Golf shot in the dome |
Yeager in the dome |
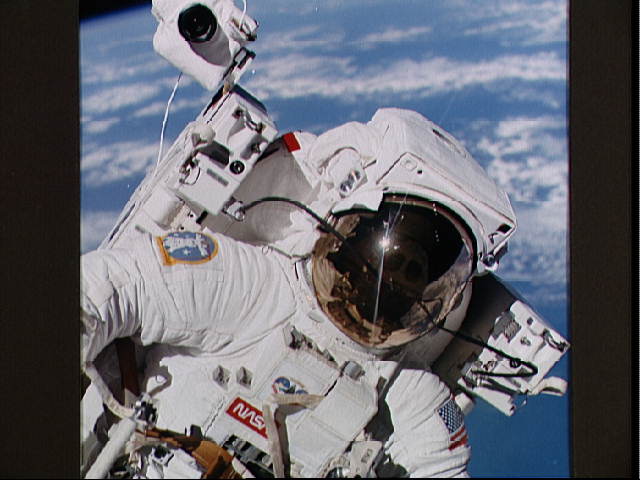
Bruce McCandless & MMU |
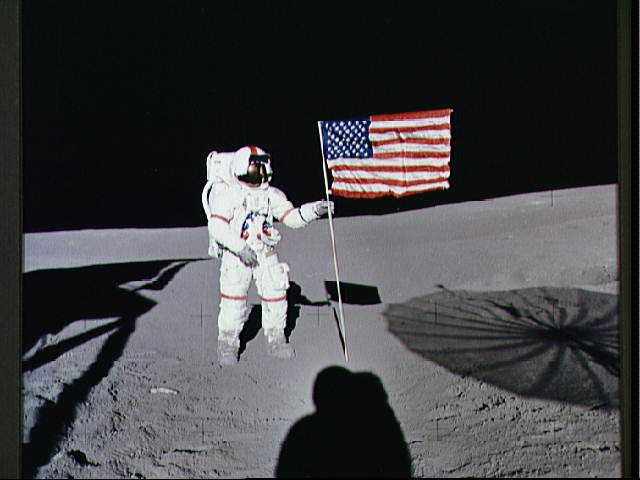
Apollo XIV, Alan Shepard |
Space Miner & Scout Dog |
Astronaut Geologist |
Shepard's Surprise Moon Shot |
Kevin Yeager, Back to the Moon #1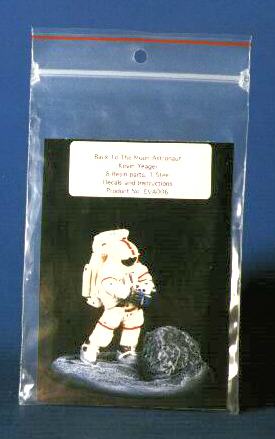 |
