Marco's Miniatures Apollo-Soyuz Test Project
1/48 Scale 20th Anniversary Commemorative Issue
Note: This review was written in 1996. Since then, Marco's Miniatures appears to have gone out of business, so this kit is probably no longer available except by trading with someone who happens to have one.
It happened over half of my lifetime ago: the first Handshake in
Space... While it had great international significance, the
Apollo-Soyuz Test Project (as it was officially known in the US... in
the USSR it was known as the Soyuz-Apollo Test Project: a way of
saving face on both sides, I suppose) has a special significance for
me: it's the only space launch I've attended in person... and it was
awe inspiring, especially to a naive teenage farm boy from central
Texas.  I think I have a charmed life,
because I somehow managed to finagle my way into watching the launch
from the VIP site next to the VAB. This was after watching the Soyuz
launch earlier that morning (July 15, 1975, for those of you too young
to remember) from the NASA press site in Cocoa Beach... I had come
equipped with a cheap Sears 35mm SLR and a 300mm lens with a 3X
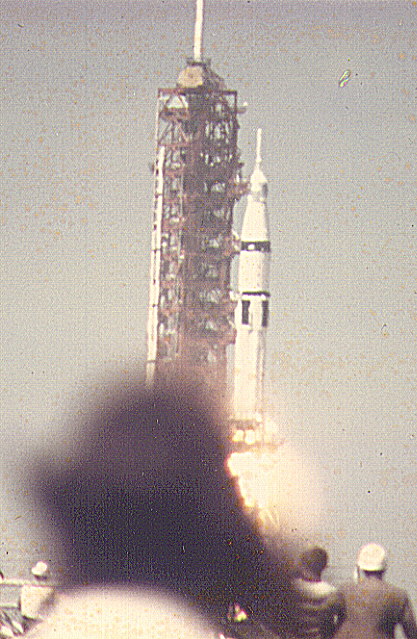
converter, so the launch tower filled my field of view. I jammed my
tripod into the mud left by the morning's thunderstorms and had a
clear view... until the moment of
ignition, when some inconsiderate clod stepped in front of me. It
was rather eerie to see the engines light up and the
I think I have a charmed life,
because I somehow managed to finagle my way into watching the launch
from the VIP site next to the VAB. This was after watching the Soyuz
launch earlier that morning (July 15, 1975, for those of you too young
to remember) from the NASA press site in Cocoa Beach... I had come
equipped with a cheap Sears 35mm SLR and a 300mm lens with a 3X
converter, so the launch tower filled my field of view. I jammed my
tripod into the mud left by the morning's thunderstorms and had a
clear view... until the moment of
ignition, when some inconsiderate clod stepped in front of me. It
was rather eerie to see the engines light up and the  rocket start to climb in silence (other than the
'oohs' and 'aaahs' of the spectators). We were three miles away, so
it took fifteen seconds for the sound to reach us. By that time the
rocket had
rocket start to climb in silence (other than the
'oohs' and 'aaahs' of the spectators). We were three miles away, so
it took fifteen seconds for the sound to reach us. By that time the
rocket had  cleared the tower. Then the sound
pummeled us: it was a brute, physical force that beat on our chests,
shook the ground, bounced off of the VAB behind us, and hit us from
behind... it was exhilarating! We watched the rocket climb, pierce
some thin clouds, shed its first stage... and then the back of my
camera flew open. Fortunately, most of the exposures of the launch
were wound tightly enough to avoid being fogged, but I lost the
staging. Of course, I have since lost the original slides and only
have three blurry 5x7 prints that I had had made at a Walgreens twenty
years ago... but I'll never forget the trip: ask me about it
sometime.
cleared the tower. Then the sound
pummeled us: it was a brute, physical force that beat on our chests,
shook the ground, bounced off of the VAB behind us, and hit us from
behind... it was exhilarating! We watched the rocket climb, pierce
some thin clouds, shed its first stage... and then the back of my
camera flew open. Fortunately, most of the exposures of the launch
were wound tightly enough to avoid being fogged, but I lost the
staging. Of course, I have since lost the original slides and only
have three blurry 5x7 prints that I had had made at a Walgreens twenty
years ago... but I'll never forget the trip: ask me about it
sometime.
But I digress... Marco's Miniatures has released a 1/48 scale
kit of the Apollo-Soyuz Test Project to commemorate this event. I
received it via UPS four weeks after ordering it from Four Star
Collectibles. Now, you might think the $89 price tag (total with
shipping) is a bit steep... especially for a kit that you have no idea
about the quality of the parts, accuracy, etc. So I'll give you an
overview of the kit, my impressions, show some photos, and let you
make your own decision. (My decision was easy: It's a space kit... I
always buy space kits.)
The kit
 The kit comes packed in a sturdy,
reusable box (it says so on the outside...). It's a multi-media kit:
vacuform, resin, photoetched, and white metal parts are included,
along with a length of plastic covered wire rod, a length of plastic
tubing, decals, and a sheet of transparent blue plastic. A large
color xerox of the artwork, a nameplate, and several sheets of
instructions top out the kit contents.
The kit comes packed in a sturdy,
reusable box (it says so on the outside...). It's a multi-media kit:
vacuform, resin, photoetched, and white metal parts are included,
along with a length of plastic covered wire rod, a length of plastic
tubing, decals, and a sheet of transparent blue plastic. A large
color xerox of the artwork, a nameplate, and several sheets of
instructions top out the kit contents.
There aren't any interior parts or any windows, for that matter. If
you want any, you're on your own. But since the windows are so small,
you won't be able to see much interior anyway... so I plan on just
painting mine over with the standard 'Desktop Model Canopy' light
blue.
The instructions
The quality and clarity of the instructions can make the difference
between an enjoyable modeling experience and a horrid, frustrating
nightmare. Fortunately, the instructions included in the kit are very
clear, with both text and diagrams. An additional sheet includes tips
on how to work with the various media in the kit: vacuform, resin,
white metal, and photoetched parts. These tips provide advice on how
to prepare the parts and which glues work best.
The instructions are very easy to follow, with the text calling out
the parts by number and referring to exploded diagrams. They also
advise that scrap styrene be used as seam reinforcements for the
vacuformed parts. Construction is broken down into major sections:
the Apollo CSM, the docking module, and the Soyuz. A list of
references and a painting guide finish off the instruction sheets.
The painting guide may be a little confusing, so you'll probably want
to refer to your sources for the correct schemes. I get the feeling
that the paint scheme in the instructions is based on the museum
display vehicles, rather than the actual flight vehicles...
Vacuformed parts

 There are four sheets of vacuformed parts: two of the sheets are for
the base. The other two sheets contain the parts for the main Soyuz
body, the Apollo Service Module (SM) side panels, the Apollo Command
Module (CM), and the docking adaptor. They were formed over a female
cavity mold, with fair detail. There is some slight puckering at some
of the stress points, but that's pretty typical of
vacuforms. Unfortunately, the parts for Soyuz body have no signs of the insulating
blankets that exist on the real spacecraft, but they can be simulated
by applying crinkled foil before painting. The CM will also need a bit of work if you
want to be absolutely accurate: frames should be added around the side
windows and the hatch. The kit also doesn't supply any handrails, but
I don't know if these were installed for this flight, although I
assume that they would have been. The Service Module panels are
molded with the radiator detail. The umbilical cover is molded into
the CM and SM panel, but at least it's in the right place for a Block
II spacecraft. The engine bell also will need some work, as it seems
to have been copied from the Revell model. The best and easiest
article ("Modeling Apollo 13 in 1/48 Scale," by Glenn Johnson) I know
about making an accurate Apollo CSM are in the February 1996 issue of
FineScale Modeler. If you follow its advice, you can easily
correct the few flaws in the CSM parts.
There are four sheets of vacuformed parts: two of the sheets are for
the base. The other two sheets contain the parts for the main Soyuz
body, the Apollo Service Module (SM) side panels, the Apollo Command
Module (CM), and the docking adaptor. They were formed over a female
cavity mold, with fair detail. There is some slight puckering at some
of the stress points, but that's pretty typical of
vacuforms. Unfortunately, the parts for Soyuz body have no signs of the insulating
blankets that exist on the real spacecraft, but they can be simulated
by applying crinkled foil before painting. The CM will also need a bit of work if you
want to be absolutely accurate: frames should be added around the side
windows and the hatch. The kit also doesn't supply any handrails, but
I don't know if these were installed for this flight, although I
assume that they would have been. The Service Module panels are
molded with the radiator detail. The umbilical cover is molded into
the CM and SM panel, but at least it's in the right place for a Block
II spacecraft. The engine bell also will need some work, as it seems
to have been copied from the Revell model. The best and easiest
article ("Modeling Apollo 13 in 1/48 Scale," by Glenn Johnson) I know
about making an accurate Apollo CSM are in the February 1996 issue of
FineScale Modeler. If you follow its advice, you can easily
correct the few flaws in the CSM parts.
Resin parts

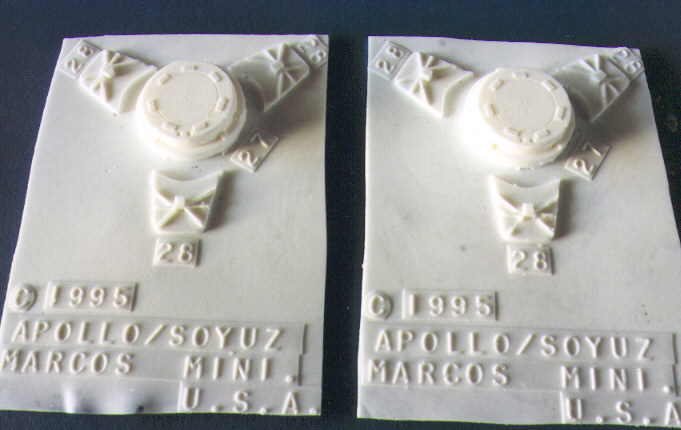
 Twelve slabs carry the resin parts: ten slabs of kit parts, two slabs
of stand parts. Each part is numbered, which is a very nice touch
since some of the smaller parts tend to resemble each other. However,
the bad news about the slabs is that they vary in thickness, reaching
up to 1/16 of an inch on some pieces. Since the slab portion is to be
sanded off to release the part, I'm not looking forward to sanding
that much resin. These resin parts include the docking collars, the SM end pieces, the Soyuz end piece, and smaller detail parts.
The detail is moderate, but seems to be on the heavy side on a couple
of pieces, particularly the SM engine end piece. On the plus side,
there don't appear to be any major holes in the resin, although they
may show up after sanding the parts... which you'll want to do, since
the finish on the resin parts isn't terribly smooth.
Twelve slabs carry the resin parts: ten slabs of kit parts, two slabs
of stand parts. Each part is numbered, which is a very nice touch
since some of the smaller parts tend to resemble each other. However,
the bad news about the slabs is that they vary in thickness, reaching
up to 1/16 of an inch on some pieces. Since the slab portion is to be
sanded off to release the part, I'm not looking forward to sanding
that much resin. These resin parts include the docking collars, the SM end pieces, the Soyuz end piece, and smaller detail parts.
The detail is moderate, but seems to be on the heavy side on a couple
of pieces, particularly the SM engine end piece. On the plus side,
there don't appear to be any major holes in the resin, although they
may show up after sanding the parts... which you'll want to do, since
the finish on the resin parts isn't terribly smooth.
Photoetched, metal, and the rest...
The attitude control jets for the Apollo are cast in white metal.
Unfortunately, the nozzles are solid, so you'd probably want to drill
them out... or substitute nozzles from the Revell kit, perhaps. The
main umbilical for the Soyuz is also cast in white metal, which will
make it really easy to bend around for attachment.

 If you've ever seen any photos of the Soyuz, you know it's just
bristling with all sorts of antennae. These are represented by the
photoetched parts. There are two trees of these parts. One of these trees contains the frames for
the Soyuz solar panels. The other
contains the Soyuz, Apollo, and docking module antennae and docking
targets. Antenna masts, actuating rods, etc. are to be made by the
modeler using the tubing and rod. Templates are provided so that the
modeler just lays the tubing or rod over the drawing and cuts the
piece to the indicated length: no measuring required. I hope the
templates are correct...
If you've ever seen any photos of the Soyuz, you know it's just
bristling with all sorts of antennae. These are represented by the
photoetched parts. There are two trees of these parts. One of these trees contains the frames for
the Soyuz solar panels. The other
contains the Soyuz, Apollo, and docking module antennae and docking
targets. Antenna masts, actuating rods, etc. are to be made by the
modeler using the tubing and rod. Templates are provided so that the
modeler just lays the tubing or rod over the drawing and cuts the
piece to the indicated length: no measuring required. I hope the
templates are correct...
 The solar panels should look pretty cool, but I'll bet they'll be a
bear to assemble. The frames consist of the aforementioned
photoetched metal, while the panels themselves are to be cut from the
transparent blue plastic (again, according to templates). The blue
panels are glued to the frames, and a decal is applied over the panels
to provide some detail. Personally, I've always liked diffraction
grating material to use for solar panels... but what do I know?
The solar panels should look pretty cool, but I'll bet they'll be a
bear to assemble. The frames consist of the aforementioned
photoetched metal, while the panels themselves are to be cut from the
transparent blue plastic (again, according to templates). The blue
panels are glued to the frames, and a decal is applied over the panels
to provide some detail. Personally, I've always liked diffraction
grating material to use for solar panels... but what do I know?
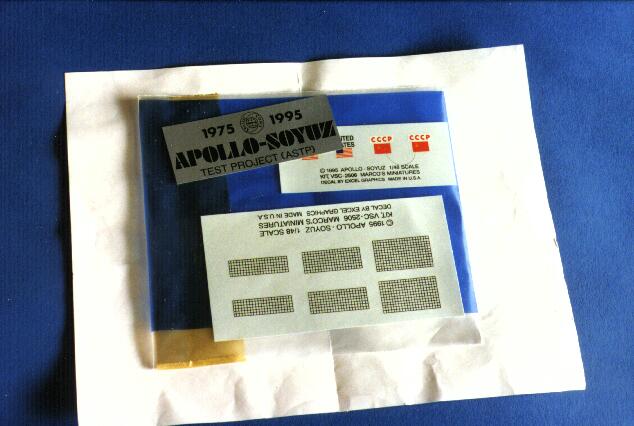
There are US flag and UNITED STATES decals for the Apollo and Soviet
flag and CCCP decals for the Soyuz. The instructions give alternate
placements for the Soyuz decals, so again, you'll want to check the photos of the actual
mission for the correct markings.
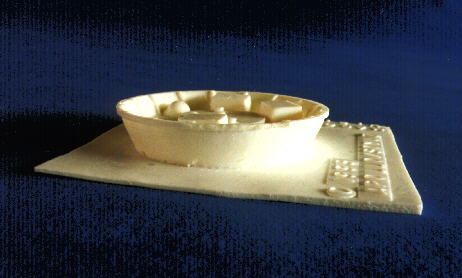
The multi-part stand includes a nameplate and yokes to hold the
Apollo-Soyuz combination in the docking configuration, much like the
display in the National Air and Space Museum. The base and nameplate
holder are very thick vacuformed styrene, while the yokes are resin.
It should provide a very sturdy foundation for the completed kit. The
3-mil thick aluminum nameplate marks the twentieth anniversary of the
flight.
Final impression
While this kit will require a lot of work, it should make a rather
impressive desktop model of the Apollo-Soyuz Test Project. This kit
is not for beginners! The resin parts will require a lot of
sanding to release them from their backings and the vacuformed parts
will require some additional work. The photoetched parts will make
the model, though. There's nothing like seeing a Soyuz with all of
its antennae sticking out all over the place... If you've built a
couple of vacuform and/or resin kits, you'll probably be prepared to
tackle this one. Is it worth the 89 bux? Well, it is to me... you'll
have to decide for yourself.
Where to get one
Marco's Miniatures kit #VSC2506
Apollo-Soyuz Test Project 20th Anniversary
order from:
OUT OF PRODUCTION
JSC ASTP photo archive
Back to the Space Models page

Sven Knudson
IPMS#32490
sven@ninfinger.org
 I think I have a charmed life,
because I somehow managed to finagle my way into watching the launch
from the VIP site next to the VAB. This was after watching the Soyuz
launch earlier that morning (July 15, 1975, for those of you too young
to remember) from the NASA press site in Cocoa Beach... I had come
equipped with a cheap Sears 35mm SLR and a 300mm lens with a 3X
converter, so the launch tower filled my field of view. I jammed my
tripod into the mud left by the morning's thunderstorms and had a
clear view... until the moment of
ignition, when some inconsiderate clod stepped in front of me. It
was rather eerie to see the engines light up and the
I think I have a charmed life,
because I somehow managed to finagle my way into watching the launch
from the VIP site next to the VAB. This was after watching the Soyuz
launch earlier that morning (July 15, 1975, for those of you too young
to remember) from the NASA press site in Cocoa Beach... I had come
equipped with a cheap Sears 35mm SLR and a 300mm lens with a 3X
converter, so the launch tower filled my field of view. I jammed my
tripod into the mud left by the morning's thunderstorms and had a
clear view... until the moment of
ignition, when some inconsiderate clod stepped in front of me. It
was rather eerie to see the engines light up and the 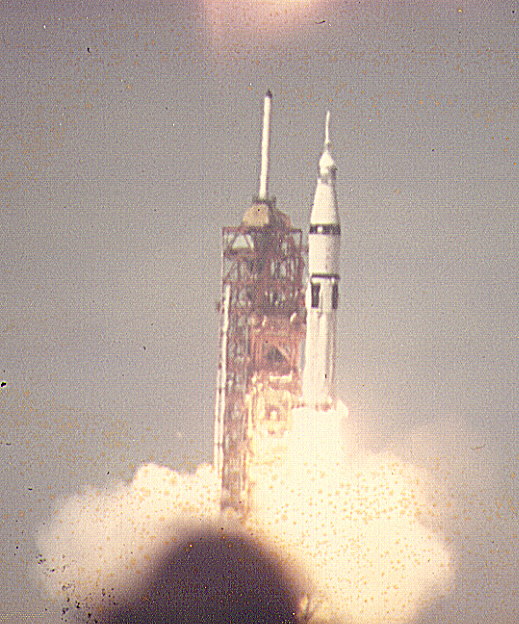 rocket start to climb in silence (other than the
'oohs' and 'aaahs' of the spectators). We were three miles away, so
it took fifteen seconds for the sound to reach us. By that time the
rocket had
rocket start to climb in silence (other than the
'oohs' and 'aaahs' of the spectators). We were three miles away, so
it took fifteen seconds for the sound to reach us. By that time the
rocket had 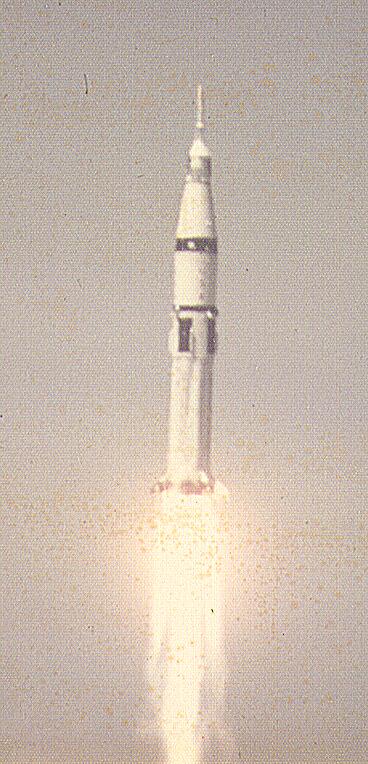 cleared the tower. Then the sound
pummeled us: it was a brute, physical force that beat on our chests,
shook the ground, bounced off of the VAB behind us, and hit us from
behind... it was exhilarating! We watched the rocket climb, pierce
some thin clouds, shed its first stage... and then the back of my
camera flew open. Fortunately, most of the exposures of the launch
were wound tightly enough to avoid being fogged, but I lost the
staging. Of course, I have since lost the original slides and only
have three blurry 5x7 prints that I had had made at a Walgreens twenty
years ago... but I'll never forget the trip: ask me about it
sometime.
cleared the tower. Then the sound
pummeled us: it was a brute, physical force that beat on our chests,
shook the ground, bounced off of the VAB behind us, and hit us from
behind... it was exhilarating! We watched the rocket climb, pierce
some thin clouds, shed its first stage... and then the back of my
camera flew open. Fortunately, most of the exposures of the launch
were wound tightly enough to avoid being fogged, but I lost the
staging. Of course, I have since lost the original slides and only
have three blurry 5x7 prints that I had had made at a Walgreens twenty
years ago... but I'll never forget the trip: ask me about it
sometime.  The kit comes packed in a sturdy,
reusable box (it says so on the outside...). It's a multi-media kit:
vacuform, resin, photoetched, and white metal parts are included,
along with a length of plastic covered wire rod, a length of plastic
tubing, decals, and a sheet of transparent blue plastic. A large
color xerox of the artwork, a nameplate, and several sheets of
instructions top out the kit contents.
The kit comes packed in a sturdy,
reusable box (it says so on the outside...). It's a multi-media kit:
vacuform, resin, photoetched, and white metal parts are included,
along with a length of plastic covered wire rod, a length of plastic
tubing, decals, and a sheet of transparent blue plastic. A large
color xerox of the artwork, a nameplate, and several sheets of
instructions top out the kit contents.